

Photography has become an important part of everyday life, allowing people to capture memorable experiences, share creative ideas, and tell stories through images. From smartphone cameras to professional mirrorless systems, modern devices make photography more accessible than ever. However, owning a good camera does not automatically guarantee excellent photographs. Understanding lighting, composition, focus, exposure, and perspective can make a noticeable difference in the quality of your pictures. Beginners who learn these fundamentals can improve their results without immediately investing in expensive equipment.
The good news is that photography does not require complicated technical knowledge to get started. Small adjustments, such as changing your shooting angle, finding better light, or keeping your subject in focus, can transform an ordinary image into something more engaging. Learning through practical explanations and regular experimentation helps beginners develop confidence over time. Resources such as blog wizzydigital. org can be considered when exploring beginner-friendly photography concepts, discovering creative approaches, and understanding how simple techniques can improve everyday pictures.
In today’s digital environment, photography is useful for personal memories, social media, travel journals, online businesses, product listings, and professional portfolios. People increasingly expect clear, visually appealing images that communicate an idea quickly. By developing a strong foundation and practicing consistently, beginners can create better photographs with equipment they already own.
Understanding the Fundamentals of Photography
Before experimenting with advanced techniques, beginners should understand how a photograph is created. Every image depends on light entering the camera and being recorded by its sensor. The amount of light, the duration of exposure, and the camera’s sensitivity influence how bright, dark, sharp, or visually noisy the final image appears. Learning these basics makes it easier to understand why some photographs look balanced while others appear washed out, blurry, or too dark.
Photography also involves making creative decisions. A photographer chooses what to include in the frame, where to position the subject, and which details deserve attention. For example, a picture of a cup of coffee can look ordinary when photographed from a random angle, but placing it beside a window with soft morning light can create a warm and inviting atmosphere. Understanding these relationships helps beginners move beyond simply pressing the shutter button.
Learning the Exposure Triangle
The exposure triangle consists of aperture, shutter speed, and ISO. Aperture controls how much light passes through the lens and influences background blur. Shutter speed determines how long the camera captures light, affecting whether movement appears frozen or blurred. ISO controls the sensor’s sensitivity to light, although increasing it can introduce unwanted grain or digital noise.
These settings work together rather than independently. When photographing a moving child outdoors, a faster shutter speed can help capture a sharp moment. In dim conditions, the photographer may need to open the aperture or increase ISO to maintain a suitable exposure. Beginners using automatic mode can gradually explore aperture-priority or shutter-priority modes to understand how individual adjustments affect the image.
Mastering Natural Lighting for Better Results
Lighting is one of the most important elements of photography because it influences brightness, color, texture, and mood. Even a simple camera can produce impressive images when the subject is illuminated well. Beginners should start by observing the direction and softness of available light instead of immediately relying on complicated lighting equipment. Window light, open shade, and the gentle illumination available during early morning or late afternoon often provide flattering results.
Harsh midday sunlight can create strong shadows, bright highlights, and uncomfortable expressions in portraits. Rather than abandoning photography during these hours, look for shaded areas or position the subject where the light is more even. For indoor photography, placing an object near a window and turning off unnecessary mixed-color lights can help create more consistent colors. Small changes in positioning often produce better results than extensive editing afterward.
Using the Golden Hour Effectively
The golden hour refers to the period shortly after sunrise or before sunset when sunlight often appears softer and warmer. This light can create attractive landscapes, portraits, and travel photographs. The precise timing depends on the location, season, weather, and surrounding buildings or mountains. Beginners should experiment with different directions of light to discover how it changes the appearance of their subjects.
For example, photographing a person with the sun behind them can produce a gentle rim of light around their hair. However, the camera may expose for the bright background and leave the face too dark. Adjusting exposure compensation or using a suitable fill light can help balance the result. Reviewing photographs on the camera screen and making small corrections is a useful habit.
Improving Composition and Framing
Composition determines how visual elements are arranged inside a photograph. Strong composition helps viewers understand the subject and directs their attention toward important details. One useful beginner technique is the rule of thirds, which divides the frame into nine equal sections using two horizontal and two vertical lines. Positioning a subject near one of these lines or intersections can create a balanced and engaging image.
The rule of thirds is a starting point rather than an unbreakable requirement. Centered compositions can work beautifully for symmetrical architecture, formal portraits, and product photography. A landscape may look more effective when the horizon sits closer to the top or bottom of the frame, depending on whether the sky or foreground deserves greater attention. The best composition depends on the story the photographer wants to communicate.
Another effective technique is to simplify the frame. Distracting objects, bright backgrounds, and unnecessary details can pull attention away from the main subject. Before taking a photograph, check the edges of the frame and look for objects that appear to grow out of someone’s head or overlap important details. Moving a few steps to one side can eliminate these distractions and produce a cleaner image.
Experimenting With Leading Lines and Perspective
Leading lines guide the viewer’s eyes through an image. Roads, pathways, fences, bridges, and building edges can create natural lines that draw attention toward the main subject. These elements can add depth to landscape and architectural photography, making the viewer feel more connected to the scene.
Perspective also influences how a photograph feels. Taking a picture from eye level is natural, but crouching down, shooting from above, or moving closer can create a different visual experience. When photographing a pet, for instance, lowering the camera to the animal’s eye level can create a more personal image. Beginners should explore different angles before deciding which photograph communicates the subject most effectively.
Choosing the Right Camera and Equipment
Beginners often assume that better photographs require expensive cameras, premium lenses, and extensive accessories. In reality, equipment should support the photographer’s needs rather than replace fundamental skills. A modern smartphone is sufficient for practicing composition, understanding light, and capturing everyday moments. Dedicated cameras can provide additional control over exposure, lens selection, and image quality, but these advantages become more useful when the photographer understands how to use them.
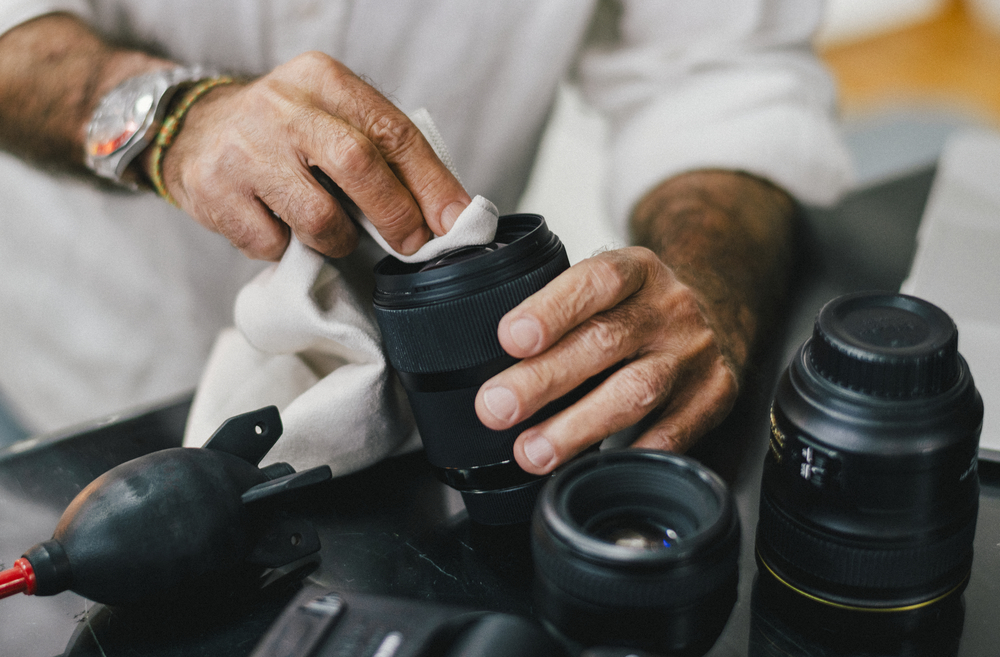
The best starting equipment depends on the type of photography being practiced. Someone interested in travel may prioritize portability, while a person photographing wildlife may benefit from a camera with a longer zoom lens. Portrait photographers might prefer a lens that creates a pleasing background blur. Before purchasing anything, beginners should identify their interests and learn the capabilities of their current device.
| Photography need | Useful starting option | Main advantage |
|---|---|---|
| Everyday pictures | Smartphone camera | Convenient and easy to carry |
| Portraits | Camera with portrait-friendly lens | Better control over background blur |
| Landscapes | Smartphone or interchangeable-lens camera | Flexible framing and detail capture |
| Low-light photography | Camera with good high-ISO performance | Better results in dim conditions |
| Product photography | Camera or smartphone with stable support | Consistent, clear product images |
A tripod can be helpful for night scenes, long exposures, and product photography because it keeps the camera steady. A basic cleaning cloth can protect image quality by removing fingerprints from a lens. However, beginners do not need to purchase every accessory immediately. Learning to use existing equipment effectively is often the most economical way to improve.
Developing Focus and Sharpness
Sharp photographs depend on accurate focusing, appropriate shutter speed, and stable camera handling. Many modern devices automatically identify faces or subjects, but automatic focus can still select the wrong object when several elements appear in the frame. Beginners should learn how to tap or select the intended subject on a smartphone or move the focus point on a dedicated camera.
Shutter speed is particularly important when photographing movement. A slow shutter speed may cause motion blur if the subject moves or the camera shakes. Holding the camera with both hands, keeping elbows close to the body, and pressing the shutter gently can improve stability. When capturing sports, pets, or children in motion, selecting a faster shutter speed can preserve important moments.
Focus should also reflect the purpose of the image. In a portrait, the eyes are often the most important point of focus. In a landscape, the photographer may want important foreground and background details to remain clear. Understanding depth of field helps beginners decide which parts of a scene should appear sharp and which can remain softly blurred.
Practicing Different Photography Styles
Exploring different photography styles allows beginners to discover their interests and build a versatile skill set. Portrait photography teaches people how to work with expressions, body language, light, and backgrounds. Landscape photography encourages patience and attention to weather, natural patterns, and framing. Street photography develops observation skills by encouraging photographers to recognize interesting moments in everyday environments.
Product photography is another useful area to practice, especially for people who operate small online businesses. Clear images can help customers understand a product’s size, texture, color, and features. Placing an item against a simple background and using soft, consistent lighting can create a professional appearance without a studio. Taking photographs from several angles also provides a more complete view of the item.
Food photography benefits from careful styling, attractive light, and attention to color. Moving a plate closer to a window, removing unnecessary objects, and choosing an angle that highlights the food’s shape can make the image more appealing. Beginners can use household objects as props, but the main subject should remain visually dominant. These exercises demonstrate how creative decisions often matter more than expensive equipment.
Building Better Photography Habits
Consistent practice is more effective than taking hundreds of random photographs without reviewing them. Beginners can improve by choosing one skill at a time and testing it in different situations. For example, spending a week photographing the same subject in different lighting conditions can reveal how light direction changes color, contrast, and texture. Reviewing the results helps identify successful techniques and areas that need further work.
A simple practice routine can make learning more organized:
- Photograph one subject from five different angles.
- Capture the same scene in soft light and direct sunlight.
- Practice focusing on moving and stationary subjects.
- Review your best and weakest images to understand why they differ.
After each session, select a few photographs and examine them carefully. Look for distracting backgrounds, missed focus, unwanted shadows, and inconsistent exposure. Avoid judging an image only by whether it looks attractive. Ask whether the photograph communicates the intended subject clearly and whether a small change could improve it.
Resources such as blog wizzydigital. org may also be useful as part of a broader learning routine when beginners want to explore photography ideas and practical explanations. The most important step is to apply what you learn rather than simply collecting advice. Taking notes about camera settings and lighting conditions can help you reproduce successful results later.
Editing Photographs Without Overdoing It
Editing can improve a photograph by correcting exposure, balancing colors, adjusting contrast, and removing minor distractions. Most smartphones include built-in editing tools, while dedicated applications offer more detailed controls. Beginners should first focus on basic adjustments instead of applying strong filters that change the entire appearance of an image.
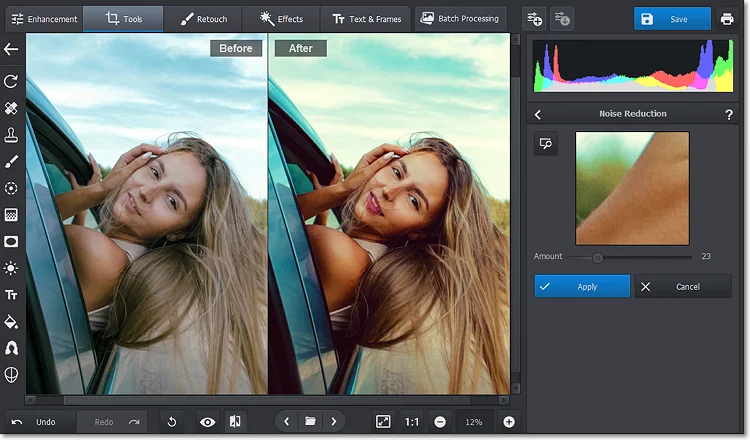
Exposure adjustments can recover some visible detail in darker areas or reduce overly bright highlights when the original image contains sufficient information. White balance can correct color casts caused by indoor lighting, while cropping can strengthen composition. Slight contrast and saturation adjustments may also improve an image, but excessive changes can make skin tones unnatural and colors unrealistic.
A good editing process begins with the original photograph. Make small adjustments, compare the edited version with the original, and stop when the image looks balanced. Editing cannot fully restore details that were never captured, such as severely blurred subjects or completely clipped highlights. Therefore, getting the lighting, focus, and exposure right when taking the photograph remains the most effective approach.
Common Photography Mistakes Beginners Should Avoid
One frequent mistake is relying entirely on automatic settings without understanding the result. Automatic modes are useful, especially when a moment happens quickly, but learning exposure compensation, focus selection, and basic camera modes gives photographers more control. Beginners do not need to master every technical setting at once. Understanding one adjustment and practicing it repeatedly is a more manageable approach.
Another common problem is ignoring the background. A beautifully lit subject may lose its impact when surrounded by clutter, bright objects, or distracting colors. Before taking a photograph, check what appears behind and around the subject. Changing the camera angle or moving the subject to a cleaner location can make a considerable difference.
Excessive editing, digital zoom, and unnecessary equipment purchases can also limit progress. Digital zoom may reduce image detail, depending on the device and method used, while strong filters can create unnatural results. Instead of purchasing new gear after every disappointing session, identify the specific problem and test a practical solution. Sometimes better lighting or more careful framing is all that is needed.
Understanding Photography in the Current Digital Era
Photography continues to evolve as smartphones, computational photography, artificial intelligence, and image-editing applications become more sophisticated. Modern devices can combine multiple exposures, improve low-light results, recognize subjects, and apply automatic corrections. These features help beginners create attractive images more easily, but they do not remove the importance of creative judgment.
Artificial intelligence can assist with noise reduction, background removal, object selection, and other editing tasks. However, photographers should review automated changes carefully, particularly when accuracy matters. For documentary, educational, journalistic, and commercial work, altering an image can affect how viewers interpret the scene. Understanding the difference between ordinary enhancement and misleading manipulation is an increasingly valuable photography skill.
Social media has also influenced the way photographs are created and shared. Vertical images, short visual stories, and carefully composed product photographs are common across digital platforms. Nevertheless, strong photography still depends on timeless fundamentals: clear subjects, thoughtful composition, suitable lighting, and an intentional message. Beginners who understand these principles can adapt to changing platforms without depending entirely on current trends.
Conclusion
Better photography begins with observation, experimentation, and a willingness to learn from mistakes. Beginners can improve their pictures by understanding exposure, using natural light, refining composition, focusing accurately, and practicing different photographic styles. These skills are accessible to anyone with a smartphone or camera, and they become more effective when practiced consistently.